Even though Macs and Windows-powered computers were two separate worlds until several years back, today you can install Windows on a Mac. However, there are different ways to do that, where certain methods can be better for some types of users.
You probably already know that Apple brought Boot Camp, its own method of installing Windows on a Mac, and running this OS almost completely natively. Still, VMware is a viable alternative for virtualization. In addition, if you know how to install and run Windows using VMware, you will be more than ready to start using other similar products such as Parallels Desktop.

In this article, we will show you how to install and run Windows, but we will also explain pros and cons of different virtualization methods. You don’t need to have any prior knowledge, and even complete beginners will be able to follow this guide.
Fundamental Differences
We will start this guide by explaining the main differences between Boot Camp and VMware. It is important to know what to expect from both of these solutions, as well as what are their pros and cons.
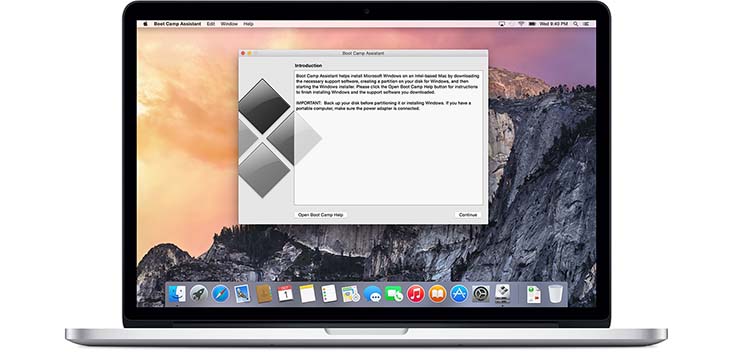
Apple has created Boot Camp in order to offer the best possible performance, as well as the easiest installation method. This tool, which supports the latest Windows 10 version, creates a bootable installation media (USB) and even automatically adds all of the needed drivers for your Mac. During the installation, it helps you partition the hard drive and gets you through the step-by-step guide. What this means is that you will need a large enough USB drive and a Windows 10 ISO file. No matter which method you pick, you need to have a valid Windows license.
The best thing about Boot Camp is that it can run Windows almost natively. Since traditional PCs and newer Macs are very similar when it comes to their hardware specs, Windows 10 can run on your Mac just like it would on any laptop. Apple has made sure to polish the drivers, so you can expect smooth performance.
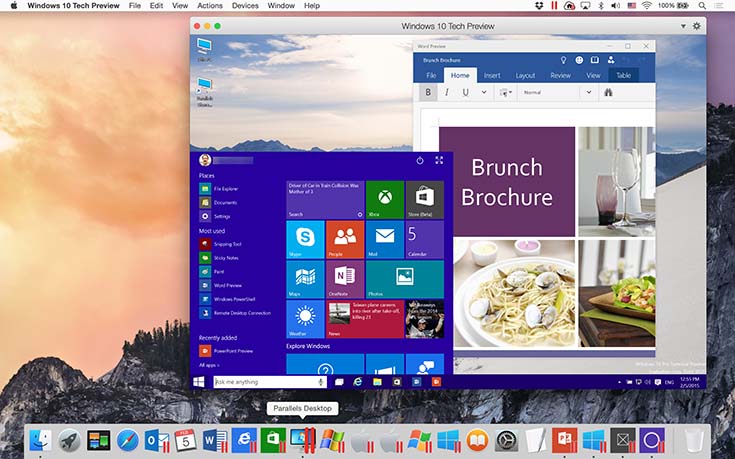
Now, on to VMware. Since this is a virtualization software, it means that it runs Windows inside your OS X. This requires a somewhat stronger machine, even though this application is optimized for various Mac desktop and laptop models. VMware allows you to run Windows in windowed mode, so you can open a single Windows application in its own window, which feels like a native Mac app. This is the best-selling feature of VMware since this is the only way to use OS X while keeping all your essential Windows applications close. The only tradeoff here is that this process takes a lot out of your Mac’s processor and memory, simply because you are running two operating systems at the same time.
Boot Camp: Essentials
Let’s jump right to Boot Camp. This is what you need to do before starting Windows 10 installation:

– It can be easier to use a Windows machine to download Windows ISO file that will be used during the installation. However, the same could be done by using OS X;
– Download the Windows Disc Image by following this link. As you will see, there are different ways to obtain Windows license. If you don’t want to spend any money, you can sign up for a Windows Insider account, where you will get to preview new builds. You can always purchase a license if you’re worried about unpredictability of new builds;
– Make sure you download 64-bit version of Windows;
– The installation file will be downloaded into your Downloads folder if you use OS X to download it.
Boot Camp: Installation
Let’s see how to install Windows on a Mac using Boot Camp. In order to install Windows 10, you will need a USB drive with at least 16GB of free space in order to add the installer file, as well as the necessary Boot Camp files. Apple’s Boot Camp was updated prior to Windows 10 launch, so now it supports the 64-bit version. This is why it’s a good idea to check for software updates to make sure your Mac has the latest firmware, as well as the most recent Boot Camp Assistant. Aside from the 16GB USB drive, you will need at least 30GB of hard drive space on your Mac. If you’re struggling with free space on your Mac, read our complete guide on how to regain gigabytes of free hard drive space.
Here are all the steps:
– As we mentioned earlier, you need to download the 64-bit Windows 10 ISO file;
– Make sure your Mac is fully updated;
– Once you have downloaded the ISO file, open the Boot Camp Assistant. You will need to tick the following boxes when asked: Create a Windows 10 install disk, and then Install Windows 10;
– At one point, you will be asked to insert the USB drive and pick the ISO file that you previously downloaded. This is done using Boot Camp Assistant;
– Boot Camp will now finish the process on its own. It will copy the ISO file and all of the needed drivers. After this process is finished, you will end up with a Windows 10 boot disk.
– Now is the time to partition your hard drive. Even though you will see that you reserve 20GB of free space for Windows 10, you should pick at least 30GB. The operating system itself will take up a lot of space, and you also need some more space for your files as well as ensure that your new OS runs optimally;
– Once you’re set the required space, you can click on Install. This will start the installation of Windows 10. During this process, your Mac will restart a few times. This is completely normal, and you shouldn’t do anything while Windows is being installed. Once finished, you will be greeted by the “We’re getting your PC ready”, which means that the installation is almost finished. However, this can take up to 15 minutes and even more on some older Mac models;
– Once the final step is finished, your Windows will restart once more. You will be greeted by the setup screen, where you can finish the process of setting everything up;
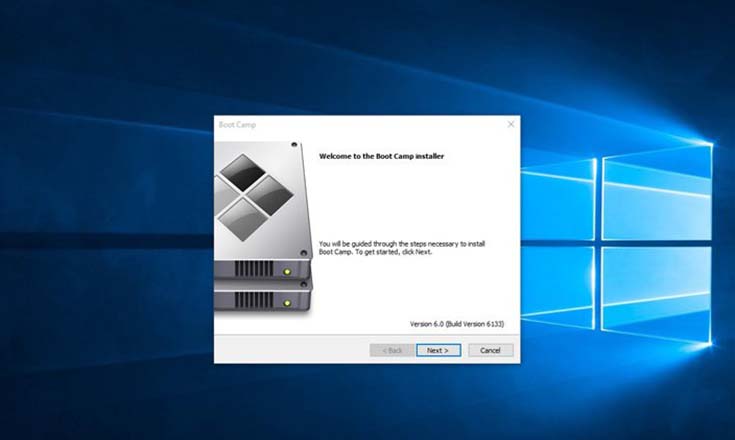
– During this process, you will be also asked to enter your license information, and you also shouldn’t forget about running setup.exe from your USB drive once Windows finally become ready for use. This will install the needed drivers;

– There is one last thing. When you need to run Windows, you will need to hold the Option/Alt key whenever you boot, until you see a menu that lets you choose which operating system to launch.
VMware Installation Method
Now we will be looking at virtualization. As said before, VMware allows you to run two operating systems at the same time, instead of having to boot into an operating system like with Boot Camp. Let’s see how to install Windows on a Mac using VMware.

Before starting the installation, you will need to get the Windows 10 ISO file, which we talked about earlier. However, you also need to download VMware Fusion and buy a license, which is currently priced at $80. There is also a free trial, which is a good thing if you’re not sure that virtualization is the way to go;
– Once you’ve downloaded the VMware Fusion, you will be able to find it in your default download directory. Find the VMware.dmg file and mount it by double clicking on it. You will be guided through a simple installation method, after which you will need to open the application. At this point, you should be greeted by the Virtual Machine Library window, which is where you will handle all your virtual machines;
– Choose VMware Fusion’s Windows Easy Installation to automatically install Windows as well as needed VMware Tools required to run the virtual machine;
– From the Virtual Machine Library window, click on the New button, or you go to File > New. This will launch the application’s Assistant;
– The Installation Assistant is the simplest method of setting up a new Windows virtual machine. You will have to go through the Operating System panel, where you get pick an operating system and its version. The Virtual Hard Disk panel will let you set the maximum size for the virtual hard disk. This step is very similar to Boot Camp’s installation step where you pick to allocate a certain hard drive space for your new OS;
– The Installation Assistant will also ask you for the Windows Product key. This is basically a license information in a form of the long series of letters and numbers;
– At this point, you should be seeing the Finish dialog box. It is a good advice to select the option Start the virtual machine and install the operating system now. Browse for the image file, and you’re all set;
– VMware Fusion can take up to one hour to install Windows 10, which depend on how fast your Mac is. Once it’s done, you can start your Windows by opening VMware Fusion within OS X.
Parallels Desktop: Essentials
In order to provide more information on different ways to run Windows on your Mac, we are also including one additional guide. Aside from VMware Fusion, there is also another popular application that does a similar thing. It’s called Parallels Desktop, and it’s also priced at $80. Each of these two applications has its own set of benefits, so it’s important to understand what you could get by choosing one of these two virtualization options.

It is believed that Parallels is for those who require a set of advanced options, as well as for those who are interested in achieving a bit deeper integration of Windows into OS X. For example, Parallels Desktop can enable Apple gestures to work with Windows application, remap iCloud, Photo Stream, Dropbox, and Google Drive folders. In addition, you can even use an existing Boot Camp installation and migrate to a virtual PC, which is a huge advantage if you’re looking to switch to a virtualization software.
Parallels Desktop: Installation
Here’s all you need to know in order to install Windows on your Mac using Parallels Desktop:

– As you can imagine, you need to acquire and install Parallels Desktop from its official website. Launch the tool and proceed to the next step;
– You will be greeted with a user-friendly welcome screen. Once you manage to install Windows, this is where you will see a list of virtual PCs. You can choose to install Windows (or some other operating system) right from the Welcome screen, or it can be done by clicking on the plus sign in case you see a list of installed operating systems;
– The application will try to scan for an image file, but you can locate it manually as well. Remember, this is where you should pick your Windows 10 ISO file, which we talked about earlier;
– Now pick “Express install”, which will lead you to a screen where you get to pick your ideal usage for the Windows installation. You can pick one of these choices: productivity, gaming, design, or software development. This is how Parallels Desktop tries to optimize the virtual PC in order to provide optimal performance;
– The next step will ask you to pick the name and location of the installation. You can also install your Windows on an external drive;
– You have reached the Windows 10 Installation screen! It should look like on a PC, where you will get to see the entire process, step-by-step. As you will see, your mouse will now become confined to the virtual space, so you will need to press “control + alt” to free cursor.
– Now each time you want to boot Windows, all you need to do is to open the application and choose your Windows installation from the Welcome screen. It couldn’t get any easier than that.
Parallels Vs. VMware
As we said earlier, even though these two applications are very much alike, they are not identical when it comes to their functionality and performance.
If we only take a look at the most recent benchmarks (August 2016), VMware is the winner. Fusion 8 seems to take the clear winner here, taking 11 out of 18 tests and pushing on three more. This means that if you’re looking to run graphics-intense games, you should probably stick with VMware. If you want to use CAD application, you can choose any of the two programs. When it comes to productivity, your best bet would be to go with Parallels Desktop simply because it offers the more user-friendly connection between Windows and OS X. After all, we all know how frustrating can be when you receive a Mac-only file, but you need to convert it into a Windows-friendly format.
Conclusion
As you were able to learn, there are different ways to install Windows on a Mac and to reliably run it. After reading this article, you should be aware of the benefits of virtualization, as well as why Boot Camp could be the best choice at times. We enjoy you will enjoy the best of both worlds!


