
During the last couple of years, we have been hearing a lot about privacy and security of our smartphones. This is actually one of the hottest topics at the moment, where companies and smartphone manufacturers are racing to offer the next best solution that will keep your sensitive data safe and help secure your iPhone.
The thing about security is that it’s tightly connected with convenience. If you stop to think about it for a minute, you will see that the faster and easier it is for us to get to a certain application, it is also faster and easier for someone else to access your data. You can set up long and complicated passwords, which is probably the best possible option, but this means that you will be entering that long password each time you pick up the phone. Clearly, this is not the solution.
JustGoodBites has been investigating on how to secure your iPhone and make it more protected against anyone who wants to take a peek at your private information and sensitive files. Keep reading this article, and you might learn a couple of interesting tricks.
-
Most Importantly, Make a Passcode
As you will see in this article, we recommend setting up Touch ID. However, before this can be done, you are required to make a passcode for your device. This is how it’s done: Go to Settings > Touch ID & Passcode, and setup up a new passcode. You will have to enter it two times to avoid any mistakes, and you are ready to go. It’s that simple to secure your iPhone!
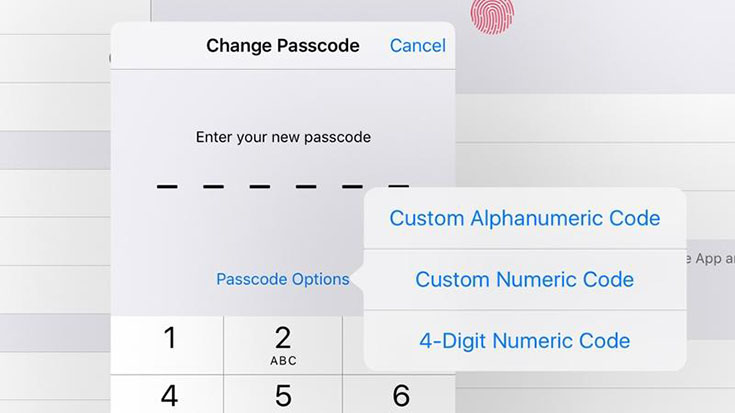
Interestingly enough, iOS 9 has upped the passcode limit from 4-digits to 6-digits. Even though this might sound like an inconvenience, once you set up Touch ID, you won’t have to enter this 6-digit password as often. This will be required when you reboot, fail Touch ID five times, or if you don’t use your iPhone for 48 hours.
-
Set up Touch ID
Since you’ve added a strong 6-digit passcode, the next step is to add Touch ID. As you can see, Apple is using biometrics to secure your iPhone, so only you can unlock it, use Apple Pay, and authorize purchases from Apple’s digital stores. This is how to set up Touch ID:
- Go to Settings > Touch ID & Passcode;
- Tap on “Add a Fingerprint”;
- Place your finger on the Home button – but don’t press it, simply place it onto the button until you feel a vibration;
- Now lift and rest your finger slowly, making small adjustments to the position each time;
- The final step is to adjust your grip, as you will see on your iPhone’s screen. You will need to hold your device as you normally would when unlocking the phone and touch the Home button with the outer areas on your fingertip.
- That’s it! You should see a confirmation screen at this point.
At any point, you can return to the Settings app and make adjustments to Touch ID. If you go to Settings > Touch ID, you will be able to turn it on/off for certain features like iPhone unlock, Apple Pay, and App and iTunes Stores. You can also add more than one fingerprint scan, rename fingerprint scans, and swipe-to-delete stored entries.

As you can see, this is the easiest way to secure your iPhone using biometrics.
-
Disable Easy-to-Access iOS Features
Even after you set up a new passcode and add your fingerprint scan to unlock your phone, there are still some easily accessible iPhone features. These are:
- Control Center: This feature can be useful to perform some basic actions like adjusting the volume and turning on/off the flashlight. On the other hand, it can be also used by a thief to turn on Airplane Mode, which prevents tracking.
- Siri: Even though Siri is highly useful, your digital assistant has already stored your personal information. What this means is that someone can easily find out who you are by asking Siri.
- Notification Center: This is a good way for someone to take a look at your messages and social network posts by simply swiping from the top of the screen
You can visit the Touch ID & Passcode page in the Settings app, where you can choose which features can be accessed from the (password locked) lock screen. You can also completely disable Control Center and turn off previews for your messages by going to the Messages page in the Settings app.
This is the only way to be completely secure your iPhone and keep your private data safe and sound.
-
Review Your Web Browsing History
Many are unaware of how much information your web browser knows about you, all through your web search history. This can be even more problematic if you log-in with your Google account, where your activity can be tracked through every website that you visit.
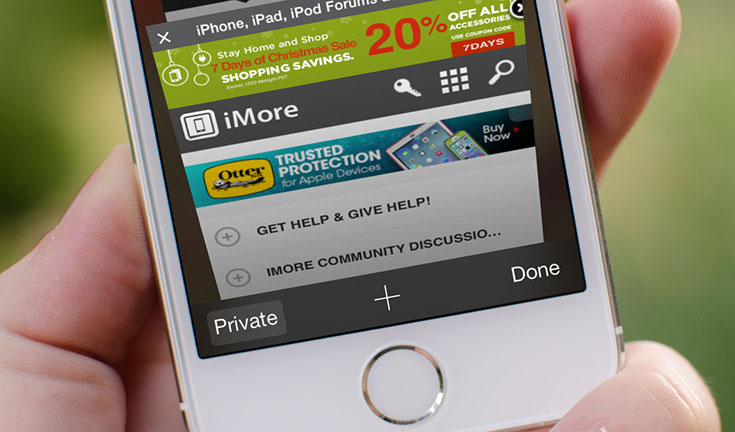
Safari was the first browser to implement private browsing, even though you can find this feature with any browser these days.
To review your web search history and possibly delete your credit card information, go to Settings > Safari. This is where you can delete your entire web search as well as cookies stored by third-party websites.
To review your entire Google account, where you can see highly detailed information about what Google knows about you, follow this link. This is important to every Google user, especially if you used an Android phone earlier.
-
Use an App to Secure Your Data
Our final advice is to seek help from a reliable third party application. More specifically, you can find password managers on the iOS App Store.
Some of the best-known apps of this type are 1Password, Lastpass, and DataVault. These apps come with action extensions, so you can safely and securely fill out forms and passwords right into Safari and other applications.

These are our Top 5 tips on how to secure your iPhone. As you can see, Apple has done a good job of providing you tools to keep your digital information secured, but there are still some important steps that are essential to those who care about privacy.
In case you have additional tips, feel free to share!
